Grow culinary chervil from labelled seed in a cool position with light shade and moist, well-drained soil. Sow where it will grow when practical, protect the young seedlings and pick tender leaves regularly. Plan replacement batches: chervil is a short-lived crop, and flowering ends its most useful leaf-growing stage. [2,7,8,13]
Chervil suits gardeners who want a delicate fresh herb for salads, eggs and light dishes. The main task is choosing a suitable growing window and maintaining steady moisture. This guide explains how to start a batch, recognise setbacks and decide when another sowing will be more useful than trying to rescue an ageing plant.
🌿 In this guide
- 🌿 Grow Herb Lab Quick Facts
- What is chervil?
- Why grow chervil?
- 🌱 Beginner checklist
- 📅 Seasonal growing calendar
- How to grow chervil
- ⚠️ Common mistakes
- 🛠 Common problems and troubleshooting
- Harvesting preserving and using chervil
- 🌿 Frequently asked questions
- 🌿 Key takeaways
- 🌿 Continue Learning
- Sources
Starting your first batch? Use the Herb Seed Germination guide to organise the seed-packet instructions, moisture checks and emergence record.
🌿 Grow Herb Lab Quick Facts
| Feature | Practical guide |
|---|---|
| Botanical name and family | Anthriscus cerefolium; Apiaceae, the carrot and parsley family. [2] |
| Growing habit | Usually grown as an annual leaf crop; may behave as a biennial in mild conditions. [2,13] |
| Position | Cool conditions and light shade; stronger sun may suit cooler periods. [8,9] |
| Soil | Fertile, moisture-retentive soil that drains freely. [10] |
| Water | Keep moisture steady; avoid both drying out and a waterlogged root zone. [5,13] |
| Indicative height | About 30–60 cm at flowering; this is not a target size for picking leaves. [2] |
| Propagation | Seed; direct sowing avoids disturbing an established root system. [7,13] |
| Culinary use | Tender leaves with a mild parsley-and-anise flavour; best used fresh. [7,8] |
What is chervil?
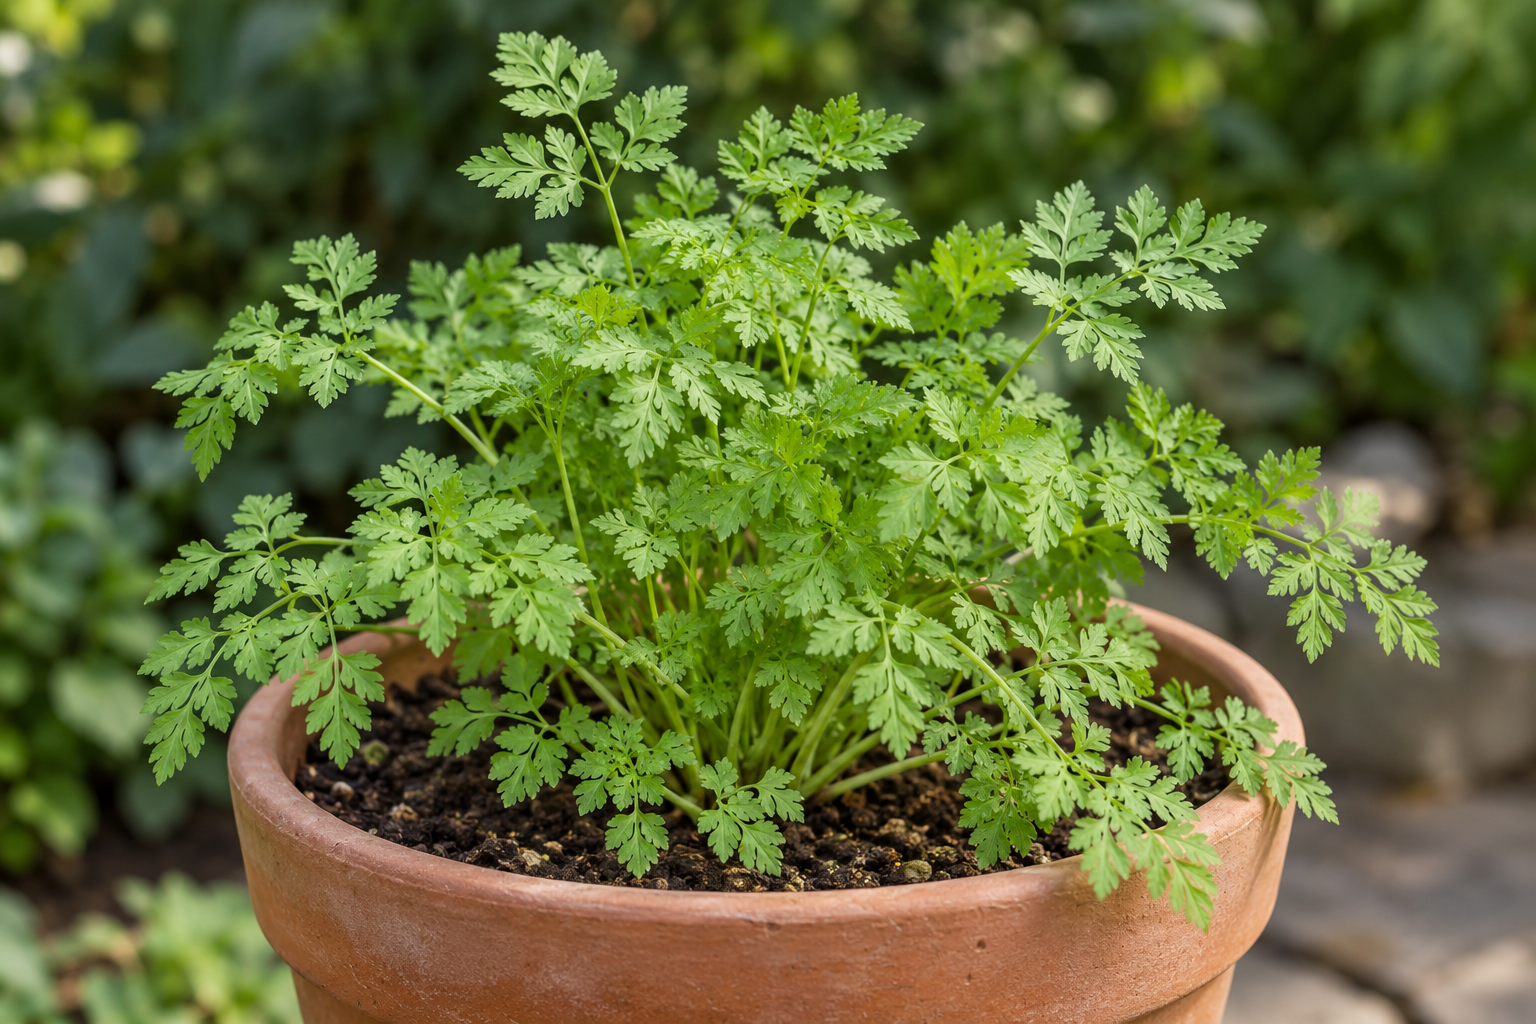
Culinary chervil has finely divided, light green leaves that resemble delicate parsley foliage. Its botanical name distinguishes it from other plants sold or described as chervil. Buy seed or plants labelled Anthriscus cerefolium for this guide. [2,7]
Chervil and parsley are separate herbs, despite their similar foliage. If you want to compare their growing needs, see the Parsley Growing Guide. Grow and identify your culinary plant from its label rather than treating an unfamiliar wild plant as an edible substitute.
Why grow chervil?
Chervil offers a light anise note without dominating a dish. It is one of the traditional fines herbes, alongside parsley, chives and tarragon. Add it shortly before serving hot food to retain its delicate flavour. [8]
Choose it when you can provide a cool growing window and will use small fresh harvests. Its short crop cycle can fit between other plantings, but it needs a replacement plan. A gardener expecting one plant to supply leaves indefinitely will find successive small batches more useful. [13]
🌱 Beginner checklist
- Buy labelled culinary chervil seed and read its depth, spacing and timing instructions.
- Choose a cool, sheltered growing position with suitable light and drainage.
- Prepare the bed or a draining container before sowing.
- Mark the sowing date and the packet’s expected emergence window.
- Check moisture gently and protect newly emerged plants from damage.
- Plan a second small sowing if conditions remain suitable.
The checklist brings together seed-packet-led sowing, suitable conditions and succession planning. [7,8,9]
📅 Seasonal growing calendar
Use the conditions in your garden rather than a national month-by-month schedule. ABC Gardening Australia presents autumn sowing in one example and winter growing in Brisbane in another. These are useful local examples, not a timetable for every Australian climate. [3,4]
| Growing context | When to consider a batch | What to check |
|---|---|---|
| Temperate Australia | As summer heat eases into a cooler autumn window; other mild periods may also suit. | Check soil moisture and exposure before sowing. An autumn example does not guarantee success at every site. [3] |
| Cool or frost-prone sites | A locally suitable cool-to-mild window when young plants can establish. | Avoid treating UK sowing dates or hardiness ratings as local instructions. Protect seedlings where local conditions require it. [1,10] |
| Subtropical Australia | The cooler part of the year; Brisbane winter growing provides one local example. | Warm autumn soil may delay emergence. Jerry Coleby-Williams reported this in his Brisbane garden; it was an observation, not a germination trial. [4] |
| Tropical or persistently hot sites | A cooler opportunity, if one is available. | Assess actual conditions before committing a full batch. This is an editorial adaptation of chervil’s preference for cool growing conditions, not a proven tropical sowing schedule. [8,13] |
| Northern Hemisphere adaptation | Use local cool-season guidance and your seed packet. | The RHS gives April–August sowing for its UK context; do not shift those dates mechanically by six months for Australia. [1] |
If your first batch struggles in persistent warmth, record the conditions and try a more suitable window. Repeating the same sowing under unchanged conditions may repeat the setback. This is a practical decision rule, not a temperature threshold.
How to grow chervil
Choose seed and a suitable position
Direct sowing is a useful starting method because established chervil does not transplant readily. Choose a position where the crop can remain. Light shade is especially useful as conditions warm; a cooler-season crop may tolerate more sun. [2,8]
Assess the hours and strength of light at your chosen spot with the Herb Sunlight Requirements guide. A general herb recommendation for full sun is not automatically the best choice for chervil. [9]
Prepare the soil and sow
Use a friable, fertile growing medium that holds some moisture while allowing excess water to drain. Moderate compost can help garden soil; avoid adding sand as a routine fix for clay. [9,10]
For help matching the growing medium to a bed or container, see Best Soil Mixes for Herbs.
Follow your seed packet first. Published sowing methods differ: NC State says chervil seed needs light, and Illinois Extension recommends very light cover or none. The RHS describes covering seed by about 1 cm. Do not combine these into a single supposedly universal depth. If the packet calls for light, preserve that instruction rather than burying the seed by default. [1,2,7]
Moisten the medium before sowing and water gently afterwards so the seed is not displaced. Keep the surface from drying while avoiding saturation. [7,9]
Spacing also varies by source: the RHS thins to 15 cm, while NC State lists 15 inches, approximately 38 cm. Use the packet or a clearly chosen growing method, then thin crowded seedlings. These figures are alternatives, not a range to average. [1,2]
The RHS gives emergence examples of 5–10 days indoors and up to three weeks outside. Conditions and seed quality matter, so record what happens rather than promising a fixed day. [1]
Grow chervil in pots
Choose a pot with drainage holes and enough room for the root system. The RHS recommends a container at least 25 cm deep and wide. Sow directly into its final container where practical; if using young module-grown plants, handle the root ball gently and avoid unnecessary disturbance. [1,10]
Use Growing Herbs in Pots for container setup and drainage checks. Judge each pot by its actual growing medium and position rather than assuming all containers need the same watering routine.
Water and feed with restraint
Inspect the growing medium, not just the leaves. Chervil benefits from steady moisture, but soggy conditions are a different problem from a dry root zone. Check drainage before adding more water to a wilting plant. [5,13]
The Herb Watering Guide explains how to make watering decisions from conditions rather than a fixed weekly schedule.
Consider what is already in the soil or potting mix before feeding. Chervil may benefit from moderate fertility, but repeated strong feeding is not a substitute for light, moisture or drainage. Avoid applying a fertiliser routine without checking the product instructions and the existing medium. [5,9]
Manage leaf growth and replacement sowings
Regular picking can encourage fresh foliage, but it does not turn an ageing, flowering plant back into a young crop. [6,13]
Plan propagation from seed. Small successive sowings, roughly three to four weeks apart while conditions suit, can help replace older plants. Adapt the interval to your space and use rather than keeping a sowing schedule through unsuitable weather. [8,13]
Understand the limits of indoor growing
Chervil may be grown indoors. [8] Indoor seed raising and an ongoing leaf crop are different goals, however. Inadequate light can produce weak growth; check the plant’s response before assuming a windowsill will provide continuous harvests. [5]
If seedlings become stretched, improve their growing conditions before increasing feeding or watering. Keep the indoor growing area ventilated and avoid persistently wet media. [5,10]
🌿 Grow Herb Lab Framework: sow, support or replace?
- Observe: check emergence, new foliage, soil moisture and any visible pests.
- Decide: is this an establishing seedling, a recoverable setback or a flowering crop nearing the end of its useful leaf stage?
- Act: correct a confirmed condition, protect the young plant or start a replacement batch in a suitable window.
- Learn: record sowing date, position and response so the next batch begins with better information.
This framework is an editorial decision aid. It helps organise observations; it does not diagnose a plant from one symptom.
⚠️ Common mistakes
- Ignoring the packet’s light or covering instructions because another source gives a different sowing method. [1,2,7]
- Sowing a whole crop into persistent heat without first testing whether local conditions suit. [8,13]
- Disturbing established roots when direct sowing was practical. [2]
- Treating wilt as an automatic instruction to add water without checking drainage. [5]
- Using extra fertiliser to compensate for inadequate light or poor drainage. [5,9]
- Expecting a flowering plant to keep producing tender leaves indefinitely. [13]
- Leaving the replacement sowing until the current crop has already finished. [8]
🛠 Common problems and troubleshooting
Start with observations and simple checks. Several causes can produce similar symptoms; the table gives a first response rather than a definitive diagnosis.
| Observation | Plausible causes | First checks | Practical response |
|---|---|---|---|
| No emergence | Sowing method, seed condition, moisture or an unsuitable growing window. [1,4,7] | Packet instructions; sowing date; whether the surface dried or stayed saturated. | Allow the appropriate emergence window. Correct a known issue and, if needed, sow a small fresh batch. |
| Weak or stretched growth | Inadequate light, especially indoors. [5] | Available light and whether seedlings lean towards it. | Improve the light situation; reassess moisture and crowding before adding feed. |
| Wilting or yellowing | A dry root zone, excessive wetness or another stress; the symptom alone is inconclusive. [5,13] | Moisture below the surface, drainage and recent changes. | Correct the condition you can confirm. Do not keep adding water to wet media. |
| Holes or missing young foliage | Slugs, snails or other chewing animals. [6,12] | Inspect the plant and surroundings, including during suitable evening conditions. | Protect vulnerable seedlings and remove observed pests by hand where practical. Do not assume every hole has the same cause. |
| Visible aphid colonies | Aphids on soft growth; associated distortion or sticky honeydew may occur. [11] | Inspect tips and leaf undersides for actual insects and natural enemies. | Monitor small populations; remove colonies gently if needed. Avoid damaging delicate foliage. |
| Flower stems and fewer useful leaves | Normal crop ageing, with warmth or moisture stress contributing. [8,13] | Plant stage, recent weather and whether a replacement batch is ready. | Maintain suitable care, but plan replacement. Removing a flower stem does not guarantee a renewed leaf crop. |
For confirmed aphid colonies, use Aphids on Herbs. If wet media and root deterioration raise a concern, use Root Rot in Herbs for further checks. Yellow leaves alone do not confirm root rot.
Harvesting preserving and using chervil
Harvest tender, fully opened foliage when the plant can spare it. Take modest amounts from a young crop and watch for fresh growth before picking again. [6,7]
The RHS gives about eight weeks and a plant at least 10 cm tall as an indicative first-harvest stage. Treat that as a guide to establishment, not a deadline. If a plant is still small or stressed, give it time before taking a useful harvest. [1]
Use fresh leaves in salads, eggs, soups or soft cheese, or combine them with other fines herbes. Add chervil towards the end of cooking or just before serving: prolonged heat reduces its delicate flavour. [3,7,8]
Fresh use best suits chervil’s flavour; drying loses much of that character. Freezing is an option for surplus leaves. [8] General herb methods include freezing leaves in a bag or chopping them into water-filled ice-cube trays. [5] Choose a method for your intended cooking use; this growing guide does not prescribe a storage life.
If keeping seed, leave a selected plant to mature its seed heads rather than expecting both unrestricted leaf harvest and a seed crop from it. Collect dry mature seed, label it and store it dry. General herb seed-saving guidance supports this approach; use your next packet or local seed advice to decide how to handle the next sowing. [9]
🌿 Frequently asked questions
Is chervil the same as parsley?
No. Culinary chervil is Anthriscus cerefolium. Its foliage is parsley-like, but its flavour and growing needs differ. [2,7]
Can I grow chervil in pots or indoors?
Yes, with suitable conditions. See the container and indoor-growing sections above; indoor harvests depend on available light and temperature. [5,8]
When should I sow chervil in Australia?
Choose a locally suitable cool growing window. Australian autumn and Brisbane winter examples support that approach, but neither is a timetable for the whole country. [3,4]
Why has my seed not emerged?
Check the packet, elapsed time and moisture before drawing a conclusion. Chervil sowing instructions differ between sources, and a locally unsuitable warm period may be relevant. [1,4,7]
Can I move established chervil seedlings?
Avoid disturbing established roots when possible. Direct sowing is a useful approach; if transferring module-grown plants, move them young and handle the root ball carefully. [2,10]
Why is my chervil flowering?
Age and growing conditions contribute. Use the framework above to decide whether to support the current plant or replace it. [13]
Can I preserve chervil?
Freezing is an option for surplus leaves, although fresh use best suits its delicate flavour. Drying causes substantial flavour loss. [5,8]
🌿 Key takeaways
- Choose a suitable cool growing window and provide appropriate light.
- Use the seed packet to resolve sowing instructions; do not average conflicting methods.
- Maintain steady moisture with effective drainage.
- Pick tender leaves and plan replacement batches while conditions remain suitable.
- Use observations to guide corrections rather than diagnosing from one symptom.
🌿 What success looks like
A useful batch establishes in its chosen position, develops fresh tender foliage and supplies small kitchen harvests while conditions suit. Your record shows what worked, and a replacement batch is planned before the older crop finishes. Success is a manageable sequence of crops, not a promise that one chervil plant will produce all year.
🌿 Continue Learning
🌿 Related herb and growing guides
Parsley Growing Guide — Compare another culinary herb with similar-looking foliage.
Growing Herbs in Pots — Plan a practical container setup.
📚 Reference guides
Herb Seed Germination — Organise sowing and emergence checks.
Herb Sunlight Requirements — Assess the light in your growing position.
Best Soil Mixes for Herbs — Match the medium to the growing space.
Herb Watering Guide — Make watering decisions from conditions.
🛠 Problem guides
Aphids on Herbs — Investigate observed aphid colonies.
Root Rot in Herbs — Check concerns about persistently wet roots.
📥 Growing resource
Free Herb Growing Kit — Use the introductory growing resource.
🌿 Final thoughts
Start with a small batch of labelled culinary chervil seed and a growing window you can manage. Watch the plant, keep a simple record and use what you learn to time the next sowing. A short crop can be worthwhile when it supplies the fresh leaves you want.
Sources
Numbered references support the cultivation and culinary guidance above. Regional examples and general herb advice are qualified in the text. The seasonal adaptations and Grow Herb Lab framework are editorial guidance, not results from a local growing trial.
[1] Royal Horticultural Society — How to grow Chervil
[2] NC State Extension Gardener Plant Toolbox — Anthriscus cerefolium
[3] ABC Gardening Australia — Handy Herbs — Jane Edmanson, 9 March 2019
[4] ABC Gardening Australia — Cold Crops — Jerry Coleby-Williams, 4 July 2015
[5] University of Minnesota Extension — Growing herbs in home gardens
[6] Royal Horticultural Society — Anthriscus cerefolium plant profile
[7] University of Illinois Extension — Chervil
[8] UC Master Gardeners of Santa Clara County — Chervil
[9] University of Maryland Extension — Care of Herbs and Starting Herbs from Seed
[10] Royal Horticultural Society — Herbs: growing and harvesting
[11] Royal Horticultural Society — Aphids
[12] Royal Horticultural Society — Slugs and snails
[13] UC Marin Master Gardeners — Chervil